What have you done to your DEFENDER today?

JimC

Super Moderator
Staff member
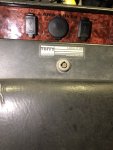
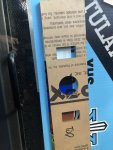
I found the maximum number of wires and things that can be shoved behind the windscreen trim. This required sacrificial zip ties, longer screws, and dark rituals.

I also set up my gauges for the mud pod 3-gauge unit. After making the wiring harness I got some clear green paint and colored the clear LED bulbs. Worked great.

0D5925BD-762D-4F9F-A703-7682D72EF5D9.jpeg
27DE0C43-3710-494F-ACD6-854E2024C3F0.jpeg
2852AF1A-8A4C-4BD6-AE06-FD415FAA0568.jpeg
ECD75AE8-902B-4780-A92F-46D903FB7205.jpeg
 

JimC

Super Moderator
Staff member
I was really trying to avoid using the fat trims from Mud.

Sadly each of these gauges lights up at a different intensity. This will only bother me, but fortunately only at night.
 

hillstrubl

Founding Member
View attachment 16079


Getting really close to taking it off the stand and putting it on the crane for clutch housing work. The oil return is millimeters from the manifold so I wrapped it but, I expect it to fail eventually. I may have to use hard copper tubing and an flare nuts, sucks.
Can you still add a heat reflector with a small piece of insulation on the oil return line side?
 

Napalm00

Technical Excellence Contributor
Can you still add a heat reflector with a small piece of insulation on the oil return line side?

This is exactly what I'm doing.

so on one side of this line I have a forged 45 fitting and on the other side I have a tube 45 fitting. It turns out that the tube fitting gives me an extra few millimeters of space.

So I removed the line then I wrapped the pipe and I'll be adding gold reflective tape to the hose. It's the best I can do I think.
 

JimC

Super Moderator
Staff member
I continue to spend hours sorting wiring and routing cables etc. I just never believe how long this takes. Almost everything is done in this pic except for the still-waiting-to-arrive brake controller.

The huge time suck was installing the Optimill rear view camera. I used a “Master Tailgaters” (stupidest name ever) rear view mirror with compass, temp, and 4 inch screen. Trying to retrofit this system to a complete truck would be incredibly time consuming, I ran the temp sensor when the fenders were off, and the RCA cable from the back etc while the headliner is out. I made an intermediate harness for the backup light that allowed me to pick up the reverse signal and power the camera. I pulled power and ground for the mirror itself from the 12v socket.

One thing that kind of sucks about the camera is that there is no reference for right-side-up, so you just have to trial and error it. My initial attempt resulted in a sideways view. In was concerned that the spare tire or ladder would block the view, but it’s no too bad. Yes, the tire takes up a big chunk of the screen, but you can adjust the parking lines to get an arrangement that is intuitive when you look at it. All in all, I’m really happy to have installed this and I hope that the system gives reliable service.

96EB1574-A5FB-4442-A520-8E007AAC9A66.jpeg
16626AC6-C828-4CA3-A4D6-3C084F2DD18B.jpeg
C596287F-C976-401A-BC24-894A7DABDACF.jpeg
9B392282-AE35-45B3-B227-D74BFFC4C90A.jpeg
 
Last edited:

lordhelemt

Well-known member
Not nearly as interesting as Jim’s project but I finally go around to making an insert to hold a couple of usb chargers and radio input for my tuffy console. Nice to be able to finish the din opening after moving the radio to the dash.
 

Attachments

  • 257C9FE8-9076-42AB-998B-08F101C928B4.jpeg
    257C9FE8-9076-42AB-998B-08F101C928B4.jpeg
    189.1 KB · Views: 172

lordhelemt

Well-known member
To be honest I’m not either. It’s just a piece of printed acrylic.

it helps when your wife has some cool equipment at the house

Couple of pics before adding the embellishment.
 

Attachments

  • 61A13369-46DF-484C-B721-2E568F6F46EC.jpeg
    61A13369-46DF-484C-B721-2E568F6F46EC.jpeg
    171.9 KB · Views: 153
  • 3D20DB43-CD77-49D9-9003-B6940F81A7A6.jpeg
    3D20DB43-CD77-49D9-9003-B6940F81A7A6.jpeg
    111.1 KB · Views: 153
Last edited:

Napalm00

Technical Excellence Contributor
IMG_20201127_162133_834.jpg
IMG_20201127_162133_835.jpg

Got some wiring done and the clutch housing , clutch.


Didn't some one get a bitrest clutch fork that didnt work? Mine didn't at all. Way too deep of a pocket for the cup. Limited articulation so that the throw out wouldn't come out far enough.
 

JimC

Super Moderator
Staff member
Didn't some one get a bitrest clutch fork that didnt work? Mine didn't at all. Way too deep of a pocket for the cup. Limited articulation so that the throw out wouldn't come out far enough.

I hope that’s not what I’m experiencing. I’ve got one of those I just installed and my bite point is right down by the floor. I get a little air out of the lines today, hopefully that will solve improve things but I’m noodling on what could cause the problem. I had thought about the wrong length operating rod, but I didn’t occur to me that the pivot hole could be too deep.
 

Napalm00

Technical Excellence Contributor
I hope that’s not what I’m experiencing. I’ve got one of those I just installed and my bite point is right down by the floor. I get a little air out of the lines today, hopefully that will solve improve things but I’m noodling on what could cause the problem. I had thought about the wrong length operating rod, but I didn’t occur to me that the pivot hole could be too deep.

Yeah unfortunately the pivot hole in this one was way too deep and I lost about 3/8 of an inch of throw. Makes a big difference. So I'm going to end up using the standard heavy duty fork instead.

I took some pictures if you would like to see the difference I can post it up
 

JimC

Super Moderator
Staff member
Mine is now buried in between the engine and gearbox, so if the bleed didn’t improved things, I’m just going to live with it for awhile...
 

JimC

Super Moderator
Staff member
Oh, and my diff lock light wasnt coming on so I decided to tighten the switch. FAIL. The POS sheared right off. Thank goodness I was able to get an easy-out into the bottom of the switch and get it to back out. I wish this transfer case had the new larger hole for the bigger switch. To avoid deadlining the truck for a few more days I just temporarily installed the tunnel so I could drive around and get some shake-down work done.

AC6173F8-0750-4A4B-9996-7ED1E53DDF4B.jpeg
 
Top