Here is a step by step guide how I converted my 1989 Defender front door windows from manual to electric using Land Rover parts.
First off here is what I ordered.
Inner door panel RH BDO710020 x1
Inner door panel LH BDO710030 x1
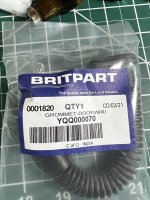
Window Clips STC4787 x4
Electric Window Regulator LH CUH000090 x1
Electric Window Regulator RH CUH000082 x1
3M Window Adhesive Primer 08682
Amazon LInk For Primer
3M Urethane Window Adhesive 08693
Amazon Link For Adhesive
M6 x 25mm Bolts x2
M6 x 10mm Bolts x6
M6 Nuts x8
M6 Flat Washers x10
M6 Rivnuts x6
Wire to make a harness
Momentary Off Momentary DP Switches x2
I used Carling switches to match the rest of my trucks switches.
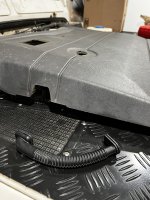
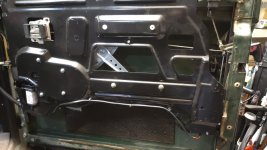
Here is what my door looked like with the inner door trim removed

This part has to go. With the window rolled most of the way down undo the 5 bolts holding the panel in place. Next remove the two screws that hold the inner door latch in place and wiggle it into the hole. Next reach inside and push the rod that it is attached to free from its little retaining clip. Carefully slide the the two bottom arms out of the slide on the bottom of the window. Set the panel aside as you will be moving the nylon screw retainers that hold the armrest and inner door lever in place.
Next up the old window track needs to be removed.

I sprayed the gasket with WD40 and dragged a razor blade between it and the glass and started to pull the rail down away from the glass. The right side window took quite a bit of effort and the left came off with very little effort. Once it is off the glass needs to be cleaned off very well for the next step. I wiped it down with brake cleaner to be sure the WD40 was removed.
This is what the end goal should look like.

Here is the products you will need on hand


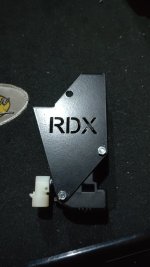
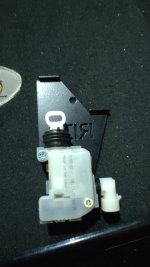
I removed both rails from the new actuators to make the install easier. Bolt the two plastic tabs to the bottom rail as seen in the picture. You may need to drill out the little dimple on the track to remove them. I then marked the glass with a Sharpie Marker so I knew where to swab on the primer and the adhesive.

I used a Q-Tip to apply the primer and a calk gun to spread the glue. I put everything into place and let the window slide down to the bottom of the door to hold everything in place as it dried. The instructions for the adhesive says it takes 48 hours to fully cure so be patient.
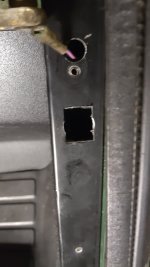
Next up you need to cut this tab from the front of the door. I used a cutoff wheel.

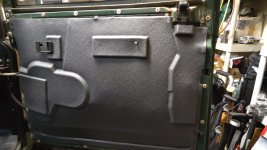
Now place the new inner panel in place and the top three holes should line up with the threaded holes at the top of the door. Reuse the old bolts and tighten it in place. At the front of the door you will need to drill out a big rivet and make two additional holes and install 3 M6 threaded rivnuts.


First off here is what I ordered.
Inner door panel RH BDO710020 x1
Inner door panel LH BDO710030 x1
Window Clips STC4787 x4
Electric Window Regulator LH CUH000090 x1
Electric Window Regulator RH CUH000082 x1
3M Window Adhesive Primer 08682
Amazon LInk For Primer
3M Urethane Window Adhesive 08693
Amazon Link For Adhesive
M6 x 25mm Bolts x2
M6 x 10mm Bolts x6
M6 Nuts x8
M6 Flat Washers x10
M6 Rivnuts x6
Wire to make a harness
Momentary Off Momentary DP Switches x2
I used Carling switches to match the rest of my trucks switches.
Here is what my door looked like with the inner door trim removed
This part has to go. With the window rolled most of the way down undo the 5 bolts holding the panel in place. Next remove the two screws that hold the inner door latch in place and wiggle it into the hole. Next reach inside and push the rod that it is attached to free from its little retaining clip. Carefully slide the the two bottom arms out of the slide on the bottom of the window. Set the panel aside as you will be moving the nylon screw retainers that hold the armrest and inner door lever in place.
Next up the old window track needs to be removed.
I sprayed the gasket with WD40 and dragged a razor blade between it and the glass and started to pull the rail down away from the glass. The right side window took quite a bit of effort and the left came off with very little effort. Once it is off the glass needs to be cleaned off very well for the next step. I wiped it down with brake cleaner to be sure the WD40 was removed.
This is what the end goal should look like.
Here is the products you will need on hand
I removed both rails from the new actuators to make the install easier. Bolt the two plastic tabs to the bottom rail as seen in the picture. You may need to drill out the little dimple on the track to remove them. I then marked the glass with a Sharpie Marker so I knew where to swab on the primer and the adhesive.
I used a Q-Tip to apply the primer and a calk gun to spread the glue. I put everything into place and let the window slide down to the bottom of the door to hold everything in place as it dried. The instructions for the adhesive says it takes 48 hours to fully cure so be patient.
Next up you need to cut this tab from the front of the door. I used a cutoff wheel.
Now place the new inner panel in place and the top three holes should line up with the threaded holes at the top of the door. Reuse the old bolts and tighten it in place. At the front of the door you will need to drill out a big rivet and make two additional holes and install 3 M6 threaded rivnuts.
Last edited: