Did you do anything to coat or treat your fuel tank prior to installation?
You are using an out of date browser. It may not display this or other websites correctly.
You should upgrade or use an alternative browser.
You should upgrade or use an alternative browser.
Building the perfect 90
- Thread starter erover82
- Start date
erover82
0
Did you do anything to coat or treat your fuel tank prior to installation?
Rust isn’t generally an issue here, but yes I treated every seam and double layer section with CorrosionX. If it doesn’t last I’ll do an aluminum tank or rear tank conversion.
Last edited:
erover82
0
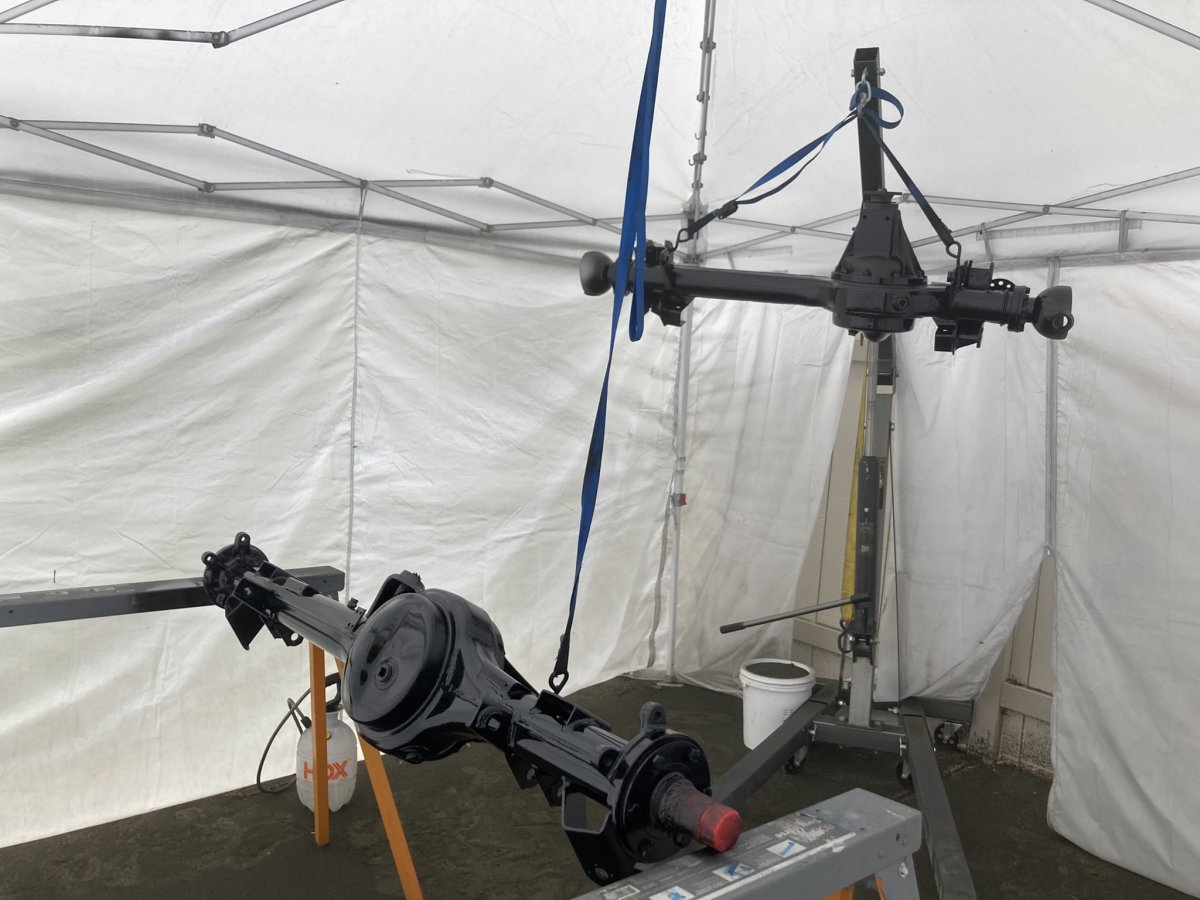
With the weather turning towards fall, I feel like this is a good time for an update. Originally I'd hoped to complete the project by fall, but that certainly hasn't happened. After the rolling chassis and drivetrain were complete the project reached a point of near-paralysis, where despite having loads of parts in waiting, none of them could be utilized. It really came down to one roadblock, paint. Parts either needed to be painted first to be fitted, or needed to be fitted to something that needed to be painted. This had to be figured out.
I've dabbled in painting enough to know that obtaining a factory quality (or better) exterior finish is very difficult as a DIYer with limited resources. The required skill, equipment, and safety considerations are just beyond what is practical for most people. For that reason I'd originally planned to save a lot of time and effort by outsourcing it to a local custom autobody shop. We had agreed on a very reasonable $3000 to paint all the parts, which would require minimal prep due to being new or prepped myself. However this negotiation was early-pandemic, and by the time I was actually ready to go, the price had ballooned to over $10,000. This isn't astronomical in terms of custom paint jobs, but when the job involves minimal prep (the majority of the labor), that has already cost a fortune, and is being applied to a 4x4 that will be used, I couldn't justify it.
(once again)
I contacted every paint shop in the area and none of them would even offer a competing quote - they were either too busy or only wanted warranty work. Having exhausted all options I was left with the realization that I'd have to do it all myself, a daunting task. I didn't have the space, the equipment, the time, or most importantly the skill, to confidently expect good results, but I had to give it a go.
Paint tent 1.0, seen here, was destroyed by a storm.
Paint tent 2.0, seen here, was also destroyed by a storm.
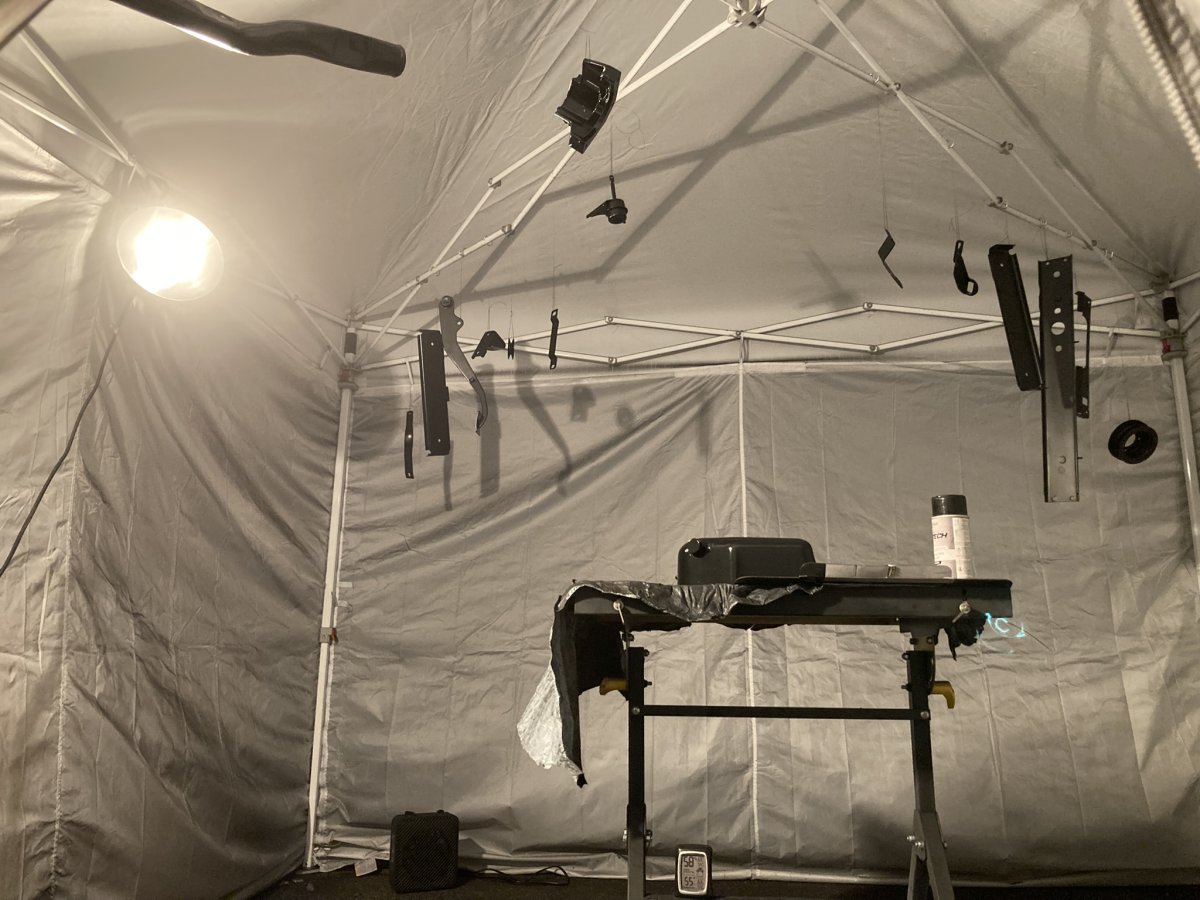
Paint tent 3.0 would have to be improved. It would need to be larger, better lighted, better ventilated, and better thermally regulated. I started by purchasing a 12x12 tent, large enough to do a 90 tub. Then I added an external diesel heater, hanging IR heater, and experimented with insulation techniques (seen below).


Filtered intake to deliver clean airflow.

Remote temperature and humidity monitoring device and 360 degrees of LED lighting.

Lacking 220v in the shop, I have two 110v air compressors: one in the shop which is quiet, compact, and maybe 50% duty cycle, and another outside which is loud, larger, and 100% duty cycle. I plumbed both together and built an after-cooler out of a transmission cooler and and industrial fan to deliver enough dry cool air. Downstream I have a centrifugal filter, Motor Guard M100 filter, and a large diaphragm regulator. All fittings are high-flow and the final hose is the light-weight hybrid type that makes maneuvering a paint gun easier.
For paint guns I have a 0.8mm gun for Cerakote, 1.3mm HTE gun for epoxy primer, 2.5mm gravity gun for undercoating, and 1.4mm LVLP and 1.5mm HVLP guns for urethane topcoats.
For safety, I rely on a 3M full-face respirator, Tyvek paint suit, and the newly improved ventilation in the tent.
Altogether this is about the minimum to do what I need. Most of this I already had - supplies are where I really had to invest. More on that later.
I had some experience but really needed to improve on it to tackle this. I started by watching every pro-painting video on youtube that I could find time for and joined a few online autobody forums. Then I proceeded to paint test panels repeatedly until I could achieve consistent results. This took much longer than expected. More on that next time.
I've dabbled in painting enough to know that obtaining a factory quality (or better) exterior finish is very difficult as a DIYer with limited resources. The required skill, equipment, and safety considerations are just beyond what is practical for most people. For that reason I'd originally planned to save a lot of time and effort by outsourcing it to a local custom autobody shop. We had agreed on a very reasonable $3000 to paint all the parts, which would require minimal prep due to being new or prepped myself. However this negotiation was early-pandemic, and by the time I was actually ready to go, the price had ballooned to over $10,000. This isn't astronomical in terms of custom paint jobs, but when the job involves minimal prep (the majority of the labor), that has already cost a fortune, and is being applied to a 4x4 that will be used, I couldn't justify it.
(once again)
I contacted every paint shop in the area and none of them would even offer a competing quote - they were either too busy or only wanted warranty work. Having exhausted all options I was left with the realization that I'd have to do it all myself, a daunting task. I didn't have the space, the equipment, the time, or most importantly the skill, to confidently expect good results, but I had to give it a go.
Space
Paint tent 1.0, seen here, was destroyed by a storm.
Paint tent 2.0, seen here, was also destroyed by a storm.
Paint tent 3.0 would have to be improved. It would need to be larger, better lighted, better ventilated, and better thermally regulated. I started by purchasing a 12x12 tent, large enough to do a 90 tub. Then I added an external diesel heater, hanging IR heater, and experimented with insulation techniques (seen below).
Filtered intake to deliver clean airflow.
Remote temperature and humidity monitoring device and 360 degrees of LED lighting.
Equipment
Lacking 220v in the shop, I have two 110v air compressors: one in the shop which is quiet, compact, and maybe 50% duty cycle, and another outside which is loud, larger, and 100% duty cycle. I plumbed both together and built an after-cooler out of a transmission cooler and and industrial fan to deliver enough dry cool air. Downstream I have a centrifugal filter, Motor Guard M100 filter, and a large diaphragm regulator. All fittings are high-flow and the final hose is the light-weight hybrid type that makes maneuvering a paint gun easier.
For paint guns I have a 0.8mm gun for Cerakote, 1.3mm HTE gun for epoxy primer, 2.5mm gravity gun for undercoating, and 1.4mm LVLP and 1.5mm HVLP guns for urethane topcoats.
For safety, I rely on a 3M full-face respirator, Tyvek paint suit, and the newly improved ventilation in the tent.
Altogether this is about the minimum to do what I need. Most of this I already had - supplies are where I really had to invest. More on that later.
Skill
I had some experience but really needed to improve on it to tackle this. I started by watching every pro-painting video on youtube that I could find time for and joined a few online autobody forums. Then I proceeded to paint test panels repeatedly until I could achieve consistent results. This took much longer than expected. More on that next time.
Last edited:
MountainD
Technical Excellence Contributor
One thing that I did with paint was to run about 50' of pipe to adequately cool off and condense water in my line as it can lead to orange peel. Driers do work, but on hot air, you still have issues. I went with a dryer out of the compressor and one at the gun. Outside of that, keep the gun 90° to the work and it doesn't hurt to run it off the work before going the other direction so you don't deposit too much paint at the turn around point and cause runs. I was really decent at the end of my painting when I did the 90.... wish I was as good when I started it though!
erover82
0
One thing that I did with paint was to run about 50' of pipe to adequately cool off and condense water in my line as it can lead to orange peel. Driers do work, but on hot air, you still have issues. I went with a dryer out of the compressor and one at the gun. Outside of that, keep the gun 90° to the work and it doesn't hurt to run it off the work before going the other direction so you don't deposit too much paint at the turn around point and cause runs. I was really decent at the end of my painting when I did the 90.... wish I was as good when I started it though!
Good tips and that's really where I started from, those basic skills paired with experience painting a variety of things over the years, but not entire vehicles and the generally higher quality standards applied to automotive paint jobs. My goal was factory quality, not a perfectly blocked and cut/buffed mirror paint job that you see on show hot rods, which I think look out of place on Defenders anyway. I really wanted to learn more about subjects like optimal sandpaper and compound selection (surprisingly complex), use cases for reducer catalyzed epoxy primer, different sub-types of automotive grade urethanes, really optimizing gun setup and analyzing spray pattern tests, spray overlap/distance/speed best practices, panel prep procedures, dealing with nibs, correcting runs, best practices for optimal adhesion on different substrates like e-coat, galv, and aluminum, when to hand-sand vs DA, best practices for DA selection in terms of orbit distance/RPM, etc. I also just needed more time behind a gun practicing the sort of spraying I'd be doing and getting to know the quirks of some of the new tools, materials, and paint systems I'd be using.
In our manufacturing plants we run huge lengths of large diameter pipe, but most of the work is done by refrigerated dryers, which unfortunately are both expensive and bulky for my small shop and few projects. I could have gone to a plant and use the air systems there, like when I did the chassis, but carting all my materials back and forth is a real pain. My shop is too small and filled wall to wall with storage for long copper runs, so I had to rely on active cooling/drying from the after-cooler. I didn't mention this yet, but I later added a second larger heat exchanger and attached it to my shop's AC unit - bam! I had an inexpensive, compact, and effective refrigerated dryer.
WreckITFrank
Technical Excellence Contributor
Good thing you are not good at painting, was starting to get self conscious about my abilities 😆. Though I get cramped up after a half can of spray paint...
Keep it coming. 👍
Keep it coming. 👍
Last edited:
So what ever happened? I sure hope this thread does not die because of paint?
erover82
0
So what ever happened? I sure hope this thread does not die because of paint?
Ha no, not at all. I've just been terrible at updating the thread, though I consider it often. I essentially do nothing but work, work on this, work on projects that spawned from this, and spend time with my boys. I've probably got over 100 photos of progress backlogged for this thread. Some photos are years old at this point (sub-projects that need completed), but most are more recent. Good (and absurd) things are coming.
Whew, I completely understand on the work / project / family time triangle. Glad to hear it is progressing, and am looking forward to the update.
Bring it on! Love itHa no, not at all. I've just been terrible at updating the thread, though I consider it often. I essentially do nothing but work, work on this, work on projects that spawned from this, and spend time with my boys. I've probably got over 100 photos of progress backlogged for this thread. Some photos are years old at this point (sub-projects that need completed), but most are more recent. Good (and absurd) things are coming.
erover82
0
With the weather turning towards fall, I feel like this is a good time for an update. Originally I'd hoped to complete the project by fall, but that certainly hasn't happened. After the rolling chassis and drivetrain were complete the project reached a point of near-paralysis, where despite having loads of parts in waiting, none of them could be utilized. It really came down to one roadblock, paint. Parts either needed to be painted first to be fitted, or needed to be fitted to something that needed to be painted. This had to be figured out.
I've dabbled in painting enough to know that obtaining a factory quality (or better) exterior finish is very difficult as a DIYer with limited resources. The required skill, equipment, and safety considerations are just beyond what is practical for most people. For that reason I'd originally planned to save a lot of time and effort by outsourcing it to a local custom autobody shop. We had agreed on a very reasonable $3000 to paint all the parts, which would require minimal prep due to being new or prepped myself. However this negotiation was early-pandemic, and by the time I was actually ready to go, the price had ballooned to over $10,000. This isn't astronomical in terms of custom paint jobs, but when the job involves minimal prep (the majority of the labor), that has already cost a fortune, and is being applied to a 4x4 that will be used, I couldn't justify it.
(once again)
I contacted every paint shop in the area and none of them would even offer a competing quote - they were either too busy or only wanted warranty work. Having exhausted all options I was left with the realization that I'd have to do it all myself, a daunting task. I didn't have the space, the equipment, the time, or most importantly the skill, to confidently expect good results, but I had to give it a go.
Space
Paint tent 1.0, seen here, was destroyed by a storm.
Paint tent 2.0, seen here, was also destroyed by a storm.
Paint tent 3.0 would have to be improved. It would need to be larger, better lighted, better ventilated, and better thermally regulated. I started by purchasing a 12x12 tent, large enough to do a 90 tub. Then I added an external diesel heater, hanging IR heater, and experimented with insulation techniques (seen below).
View attachment 28443View attachment 28444
Filtered intake to deliver clean airflow.
View attachment 28445
Remote temperature and humidity monitoring device and 360 degrees of LED lighting.
View attachment 28446
Equipment
Lacking 220v in the shop, I have two 110v air compressors: one in the shop which is quiet, compact, and maybe 50% duty cycle, and another outside which is loud, larger, and 100% duty cycle. I plumbed both together and built an after-cooler out of a transmission cooler and and industrial fan to deliver enough dry cool air. Downstream I have a centrifugal filter, Motor Guard M100 filter, and a large diaphragm regulator. All fittings are high-flow and the final hose is the light-weight hybrid type that makes maneuvering a paint gun easier.
For paint guns I have a 0.8mm gun for Cerakote, 1.3mm HTE gun for epoxy primer, 2.5mm gravity gun for undercoating, and 1.4mm LVLP and 1.5mm HVLP guns for urethane topcoats.
For safety, I rely on a 3M full-face respirator, Tyvek paint suit, and the newly improved ventilation in the tent.
Altogether this is about the minimum to do what I need. Most of this I already had - supplies are where I really had to invest. More on that later.
Skill
I had some experience but really needed to improve on it to tackle this. I started by watching every pro-painting video on youtube that I could find time for and joined a few online autobody forums. Then I proceeded to paint test panels repeatedly until I could achieve consistent results. This took much longer than expected. More on that next time.
The first step on the paint journey was selecting a color, a choice I'd been agonizing over from the beginning. Now a choice had to be made. The top contenders:
A variety of white
Sandglow
Arles Blue
Keswick Green
Conniston Green
Eastnor Green (the original color)
I decided all shades of white looked better on 110s.
Sandglow, while a fun nostalgic color, could be more ostentatious than I'd prefer.
I actually liked the truck's original Eastnor Green under the farm paint. Green is a great color in general on Defenders, and it's a lighter variety which I prefer. However, I also desired a less military/OD appearance.
Arles and Conniston were hard to pass up.
In the end there was one color I returned to more often than the others. It has great classic appeal and reminds me of the vintage machinery I've worked around in industry.
That of course is Keswick Green, but with one caveat. There appeared to be much variance in shades, of which I only really enjoyed the lighter ones.
Too dark.
Just right.
Granted, there are many variables in browsing photos on a screen. Even the same paint code mixed at different times, much less different paint systems, can display noticeable variance. Having seen a few examples in person though, I knew I wanted to aim for a certain variety. Not too dark and not too gray, but also not too minty.
To this end I worked with a local paint shop, the only one in town, who dug out a dusty old Land Rover PPG swatch book. We found the color and began the process of mixing the first of many samples.
Last edited:
Land Rover color trends come in waves and Keswick green is definitely the current one. We built this one last year and I love the color. My wife really wants a Keswick green D90 for herself, but I’m apprehensive because I think it’s going to look dated like Bonatti grey or Arles Bkue.

I don’t agree. A metallic grey defender looks like it was built in 2010, and that’s not a compliment. A white defender is timeless.Looking dated is the point…
erover82
0
Metallics have never appealed to me on Defenders, but personally, Arles Blue looks as great as ever. Again, Arles and Conniston were very tempting, but I later realized I wanted something warmer than Arles and lighter than Conniston. Warmer because colors like AA Yellow, Sandglow, Tangiers Orange, or Lightstone somehow make cold metal panels feel both more comfortable and exciting. Lighter because the contrast between dark trim and light bodywork suits these trucks well. Keswick isn’t particularly warm or light, but it’s a step in that direction, and I couldn’t find anything else I enjoyed as much. I’ve certainly had plenty of time now to consider alternatives.
donb
0
I'm with you on the metallic grey but I have a friend in town that has an Arles Blue NAS that's a little faded and scratched and it looks just right 👌. I think the greens do that as well - they get that dated look as JimC said as they get used.I don’t agree. A metallic grey defender looks like it was built in 2010, and that’s not a compliment. A white defender is timeless.
90's also don't have that much surface color area and can have very little depending on how it's built. Add in if you do a black top vs white top for example it changes the whole feel of the vehicle. The pic of the tan top ST 90 vs the van sided 90 is a decent example of this.
Fair, but I think Keswick is one of those good classic colors.I don’t agree. A metallic grey defender looks like it was built in 2010, and that’s not a compliment. A white defender is timeless.