MountainD
Technical Excellence Contributor
I purchased the replacement headliner fabric CDN38 but I didn't see any how to reports. . This is for my 1991 D110. I didn't take enough pictures to do a great how to but I want to share some and my experiences. First let me state, that if you are only going to do one headliner in your life, I personally would consider taking the fabric to a headliner shop and have them do it. It isn't as easy as I thought and there is certainly a learning curve.
First and foremost, the fabric is great. No issue with it whatsoever. Good purchase and I wouldn't hesitate to get more which I probably will when I eventually do the
'90.
Taking out the headliner--I used a typical trim removal tool to remove the fir-tree push in holders on my headliner. 1/2 of them broke (1991). I got 30 replacements before doing any work and that worked out just fine. That way they all match. Removal is pretty straight forward. You will have to bend the rear two sections to get them in/out of the truck into a "V" shape--the front section just went through the door. Do this gently--you don't want to crease or break the headliner.
Once out, I pulled out all the staples around the perimeter and removed the fabric--this is very easy and it basically fell off. I then used a stiff brush and air compressor to clean up the pressed fiberboard headliner.


There was a hole in the headliner where a CB speaker was that I didn't intend to use. I used some fiber board and layed up two pieces to get the thickness right and then I used a piece of masking paper and glued that over to top to really blend the seam. It worked perfectly.


Concurrently I used Peel and Seal butyl layer for sound on the roof and then covered that with automotive Thinsulate sound/heat insulation:


Then we moved on to the headliner. I am going to touch on glue but first and foremost, I am not an expert. I used 3M 90 Super contact spray adhesive. I was warned off the 3M 77. No--I don't think that 90 is the perfect glue--it doesn't allow enough set up time. But it held like a mother and I don't expect any issues of it sagging. Let me give you all the best piece of advice I can. GET A HEAT GUN. After the first panel, we used it and it was the most invaluable tool we used by far bar none.
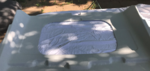
I am describing my aerosol experience--roll on glues, spray on glues, whatever you use, make sure it has some working time. For me this meant laying it on thick to the headliner--2 coats as it absorbed/flashed off quickly. This is IMHO a two or possibly 3 person job. The fabric (for the 110) came in 3 cut pieces. There will be enough extra to finish the rear vertical panel--don't worry about that--just leverage a panel or two so that one edge has most the spare. You want to make sure that it wraps up and over the edges--easy enough to do, but lay it out first and then fold back 1/2 the fabric. Spray the headliner, then spray the material, then spray the headliner again just on that half. Now, while the helper hold the fabric taught side to side and pulls it above the headliner (not touching), start at the middle and work toward the edges. Once it is down, it is down so avoid wrinkles at all costs--I laid down the center section and then the edges and didn't worry about pushing it into the corners yet. As a matter of fact, if you lay down the center and then the edges, you will have loosely taught fabric over pulled over all the corners. If you try and push these down into the recesses, it will pull up and if it does that, you will loose the glue and it will never stay. If you try and work fabric from the center up to the edges and around the edges, you will get wrinkles. That is what we tried on the first panel. I got this:
 Not ideal. I couldn't pull it back up. This is where I think the glue choice wasn't idea.
THIS IS WHERE THE HEAT GUN COMES IN.
The heat gun allows you to gently heat up the fabric and it become quite stretchy. You can then push it down and mold it around corners. It is the best and frankly the only way that I can see to get good results.

Each progressive panel got better and better. I used the heat gun to stretch the fabric over the edges too--I did this the next day--you don't need to do that right away, but whatever floats your boat. I used 1/4" staples. Only in a couple places did they ever stick through. The heat gun was invaluable to stretch it over some of the compound corners.
After the fabric was on, I cut out the sun roof. Yeah, I know, my headliner isn't for a sun roof--the whole truck is sort of hodgepodge and that is what I have to work with so I made the best of it. I cut out the sunroof leaving plenty of extra fabric. Trust me, leave extra--you can fix it after you staple it and trim off extra. The heat gun was again invaluable to get the fabric to conform and stretch and I did segment the fabric as I went around the back of it.

To be continued.... (can only attach 10 files)
First and foremost, the fabric is great. No issue with it whatsoever. Good purchase and I wouldn't hesitate to get more which I probably will when I eventually do the
'90.
Taking out the headliner--I used a typical trim removal tool to remove the fir-tree push in holders on my headliner. 1/2 of them broke (1991). I got 30 replacements before doing any work and that worked out just fine. That way they all match. Removal is pretty straight forward. You will have to bend the rear two sections to get them in/out of the truck into a "V" shape--the front section just went through the door. Do this gently--you don't want to crease or break the headliner.
Once out, I pulled out all the staples around the perimeter and removed the fabric--this is very easy and it basically fell off. I then used a stiff brush and air compressor to clean up the pressed fiberboard headliner.
There was a hole in the headliner where a CB speaker was that I didn't intend to use. I used some fiber board and layed up two pieces to get the thickness right and then I used a piece of masking paper and glued that over to top to really blend the seam. It worked perfectly.
Concurrently I used Peel and Seal butyl layer for sound on the roof and then covered that with automotive Thinsulate sound/heat insulation:
Then we moved on to the headliner. I am going to touch on glue but first and foremost, I am not an expert. I used 3M 90 Super contact spray adhesive. I was warned off the 3M 77. No--I don't think that 90 is the perfect glue--it doesn't allow enough set up time. But it held like a mother and I don't expect any issues of it sagging. Let me give you all the best piece of advice I can. GET A HEAT GUN. After the first panel, we used it and it was the most invaluable tool we used by far bar none.
I am describing my aerosol experience--roll on glues, spray on glues, whatever you use, make sure it has some working time. For me this meant laying it on thick to the headliner--2 coats as it absorbed/flashed off quickly. This is IMHO a two or possibly 3 person job. The fabric (for the 110) came in 3 cut pieces. There will be enough extra to finish the rear vertical panel--don't worry about that--just leverage a panel or two so that one edge has most the spare. You want to make sure that it wraps up and over the edges--easy enough to do, but lay it out first and then fold back 1/2 the fabric. Spray the headliner, then spray the material, then spray the headliner again just on that half. Now, while the helper hold the fabric taught side to side and pulls it above the headliner (not touching), start at the middle and work toward the edges. Once it is down, it is down so avoid wrinkles at all costs--I laid down the center section and then the edges and didn't worry about pushing it into the corners yet. As a matter of fact, if you lay down the center and then the edges, you will have loosely taught fabric over pulled over all the corners. If you try and push these down into the recesses, it will pull up and if it does that, you will loose the glue and it will never stay. If you try and work fabric from the center up to the edges and around the edges, you will get wrinkles. That is what we tried on the first panel. I got this:
THIS IS WHERE THE HEAT GUN COMES IN.
The heat gun allows you to gently heat up the fabric and it become quite stretchy. You can then push it down and mold it around corners. It is the best and frankly the only way that I can see to get good results.
Each progressive panel got better and better. I used the heat gun to stretch the fabric over the edges too--I did this the next day--you don't need to do that right away, but whatever floats your boat. I used 1/4" staples. Only in a couple places did they ever stick through. The heat gun was invaluable to stretch it over some of the compound corners.
After the fabric was on, I cut out the sun roof. Yeah, I know, my headliner isn't for a sun roof--the whole truck is sort of hodgepodge and that is what I have to work with so I made the best of it. I cut out the sunroof leaving plenty of extra fabric. Trust me, leave extra--you can fix it after you staple it and trim off extra. The heat gun was again invaluable to get the fabric to conform and stretch and I did segment the fabric as I went around the back of it.
To be continued.... (can only attach 10 files)