Well... if you are sick and tired of mopping up power steering fluid leaks from genuinely-bad ZF setup in the late Range Rover Classics or Discovery Series 1 (with serpentine belt), this article is for you.
One thing that General Motors does well is it designs awesome parts. Engines, transmissions, auxilliaries, you name it. Too bad they couldn't put them all together into an attractive vehicle if their lives depended on it - but at least we the taxpayers allowed GM to stay afloat in bad times so our trove of good parts wouldn't disappear.
One of these parts is GM heavy-duty power steering pump - the descendant
of these ugly-black things that turned the front wheels of anything from a Camaro or a Chevy pickup or a Jeep Wagoneer to school buses. You could throw all sorts of abuse at these things, and they did their job without a hint of classic Ford steering whine. They just work, and don't leak fluid.
But... there's some level of engineering to take you from that knowledge to having one in your truck. The bracket could be hacked together with some spare steel, an angle grinder, and a Harbor Freight Christmas special welder. The pulley could be sourced with the pump, maybe a little too small or too large, and the number of grooves would not necessarily match. The adapters would come from Earl's, locally or from Amazon, be returned and exchanged for proper ones, etc. Eventually, one would get a working setup in a couple of weeks, and chase the gremlins for the months to come.
Enter Nick Markiw.
This is a dude known in Defender circles for his LS3 engine conversion; nothing he does half-assed. After "field-testing" his prototype Disco 1 power steering pump conversion kit for three years and 28 thousand of hard miles, I was confident to pay him for a finalized version I intended to use in the late Range Rover Classic. Since this kit is rather a diversion for his Rover engineering, it took a while to get my hands on the hardware. Finally, after a short trip to his shop in Ramona, California, I had a box full of things that I knew would work together.
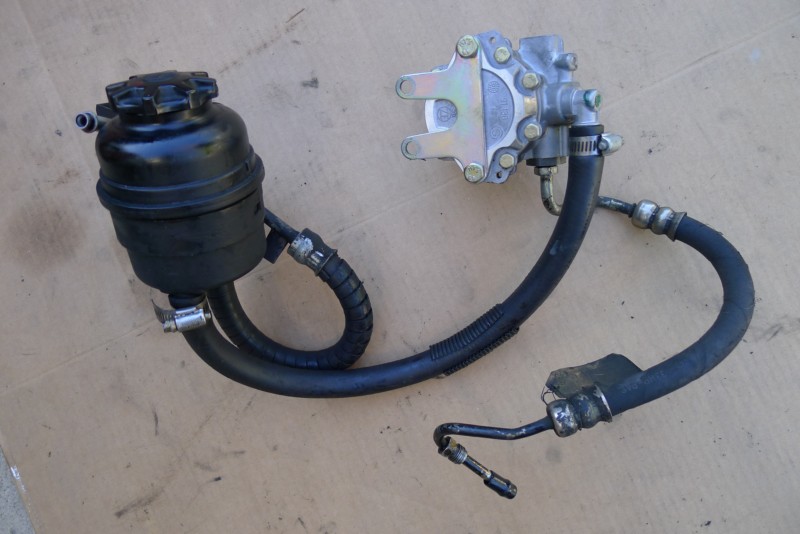
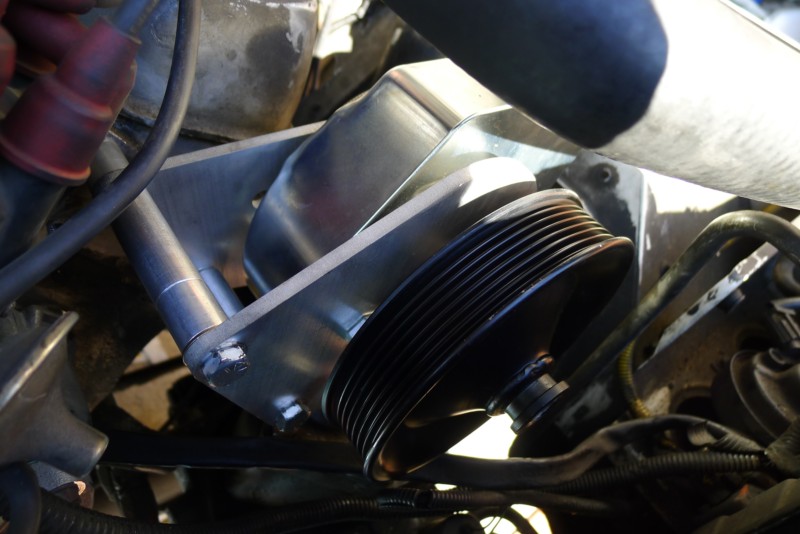
The kit includes: pump with pulley, laser-cut front and back mounting plates, bolts to mount the pump on both plates, nuts to attach the pump to the back plate, adapters for the high-pressure pump and steering box ports, a barb-fitting adapter for low pressure steering box port, a foot of hose for low pressure line with hose clamps, a proper-length serpentine belt, and a quart of GM P/S fluid. Lots of stuff in the kit, folks.
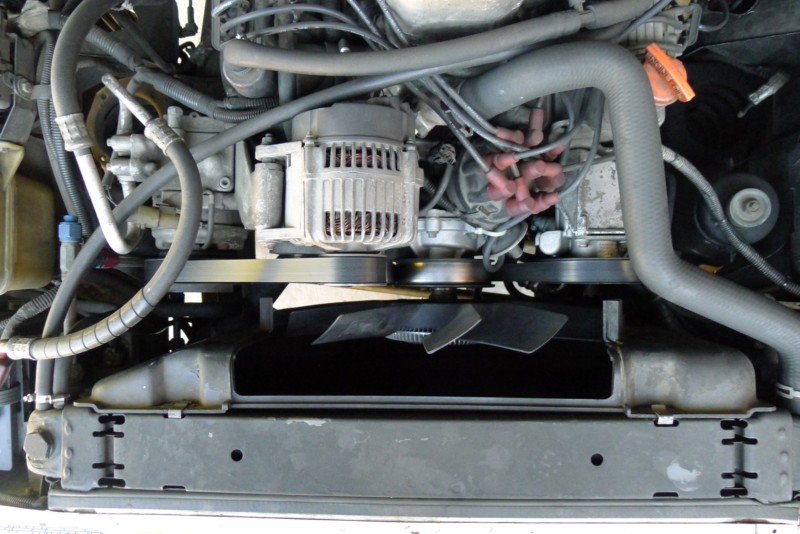
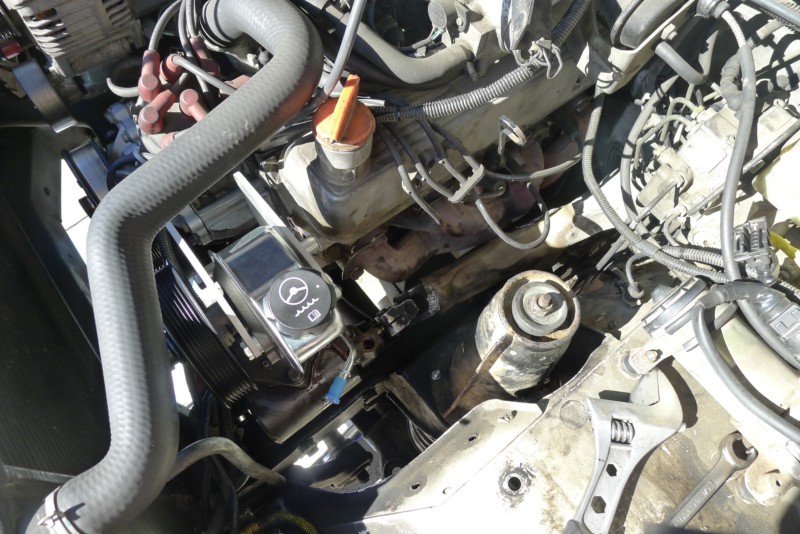
Once home, we tore into the Classic's engine bay. If you have one, you know how this all looks.
The fan shroud, fan with clutch, serpentine belt, air filter housing, MAF sensor and hose were removed for easier access to steering gear.
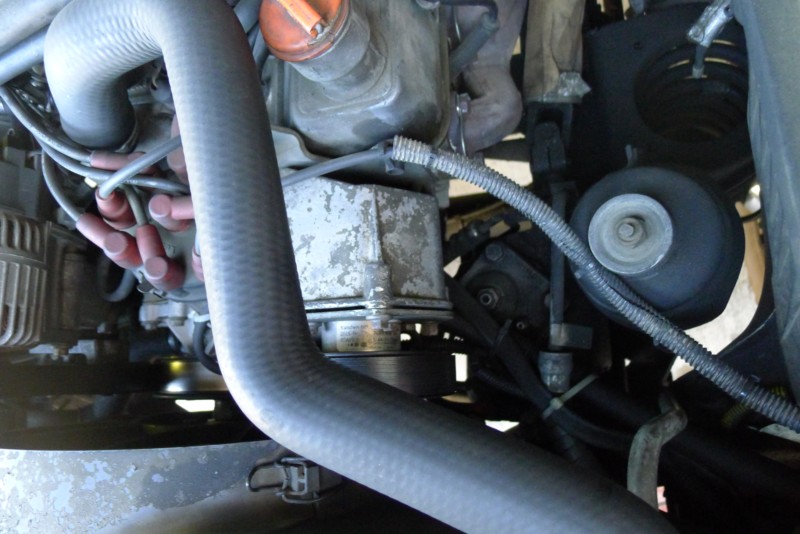
One thing I hate is the ugly mess any involvment with Land Rover steering setup invariably created. I pride myself on having been able to replace the hoses and even the entire steering box without leaking more than three ounces of fluid; this should be a little worse but not much. I figured the ZF pump, reservoir, and all hoses, could be removed as a single assembly.
The pulley is unbolted from the pump, pump - from bracket, and reservoir with the bracket - from the radiator support panel.
Just in case I screwed things up, a drip pan is placed under the front of the truck, and a few absorbent mats thrown on top of it for good measure.
Then, the fittings are unscrewed from the steering box and immediately (not quite hospital operating room immediately, but close) capped.
The pump, reservoir, and hoses, did come out nicely as a single package, with the minimal loss of fluid.
Tools needed to remove the ZF pump, reservoir, and hoses:
- 15-mm socket or 15-mm box wrench to release the belt tension;
- 36-mm fan clutch wrench;
- 10-mm socket for bolts holding the front and rear brackets of the ZF p/s pump to the cast-aluminum bracket housing; the rear bracket that usually comes with the pump requires either a tall (deep) socket or 3-6" extension.
- 13-mm socket for bolts holding the p/s pump bracket to the engine head;
- 13-mm or half-inch wrench that, along with 13-mm socket, works on the radiator support bracket that doubles as reservoir bracket;
- 9/16" and 5/8" flare wrenches for power steering lines at the steering box end;
- 1/4" hex driver for the MAF sensor hose.
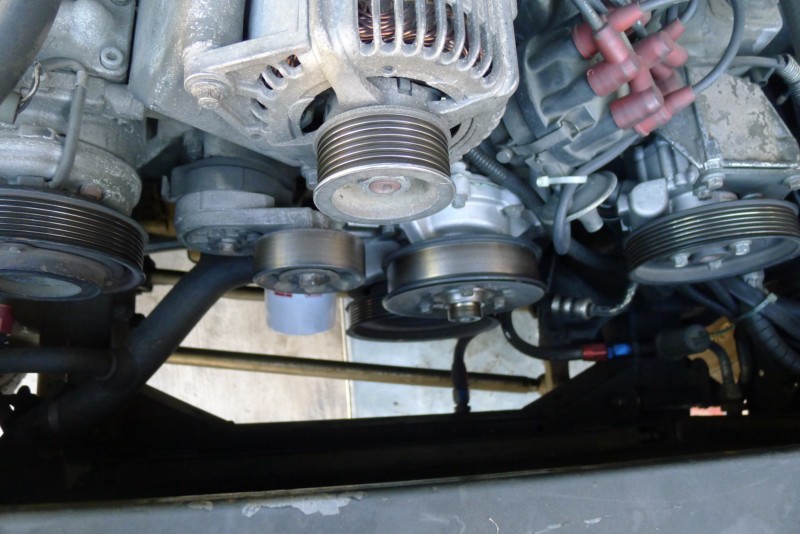
Now, it was time to bolt the shiny stuff up.
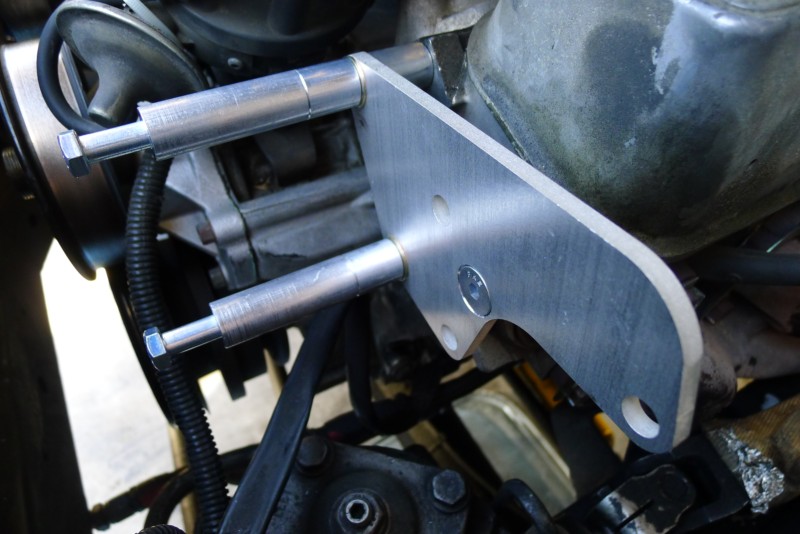
The back plate is attached to the head using an Allen screw and a spacer; it helps to use the other two long bolts to align the plate with the holes in the head.
Next went the pump with pre-attached front plate. No, it didn't. We just hit a major snag.
The low-pressure port on the pump lands exactly where the left front shock mount is on the EAS-equipped Classics. It would not have been a problem on a Disco, but... what do we do now?
We discussed a few options.
Option 1 involved using inch-and-a-half spacers between the framerail and the shock mount. It wouldn't completely clear the port, so we'd have to bend the tube about half an inch towards the pump body.
Option 2 involved researching the availability of one of myriad versions of the same pump, but with the low pressure port aimed in a different direction. Yes there is such a version, for example, one for 1971 Dodge Charger (then as now, ChryCo gladly used GM hardware whenever they could) - but (a) it used a keyed and threaded shaft, and (b) it was unavailable anywhere in San Diego.
Option 3 involved relocating the front left shock from where it was to a Disco 1 location - through the coil spring. Aside from a slight unease of having front shocks in different locations relatively to the front axle, we needed a Disco 1 shock turret. I just happened to throw a perfectly good pair of these in the trash a couple of months ago, so... we cannibalized one off my old trusty Disco 1 sitting in the garage. The lack of shock turret bolt ring is a minor annoyance; the snag cost us about an hour and a half, since we had to remove the left coil spring, lower spring retainer, insert grade 8.8 8-mm bolts into the holes in the frame spring bracket, and reinstall the spring. Eventually, the shock was relocated, and in went the pump.
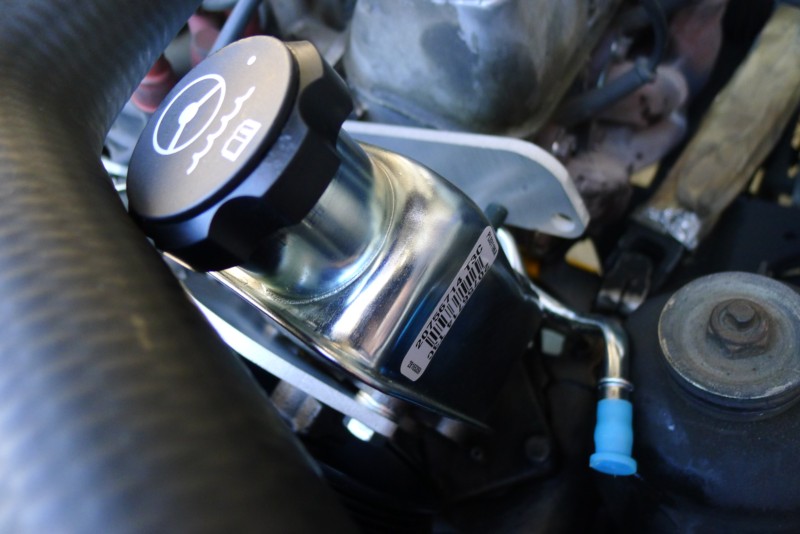
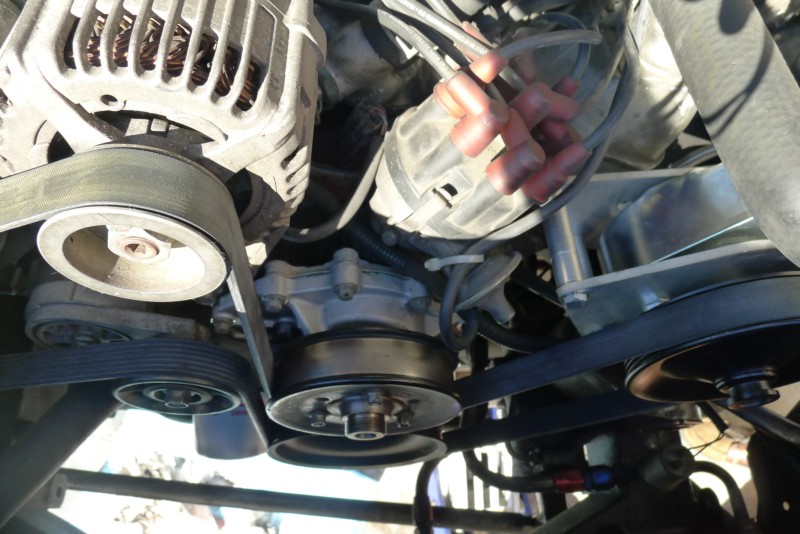
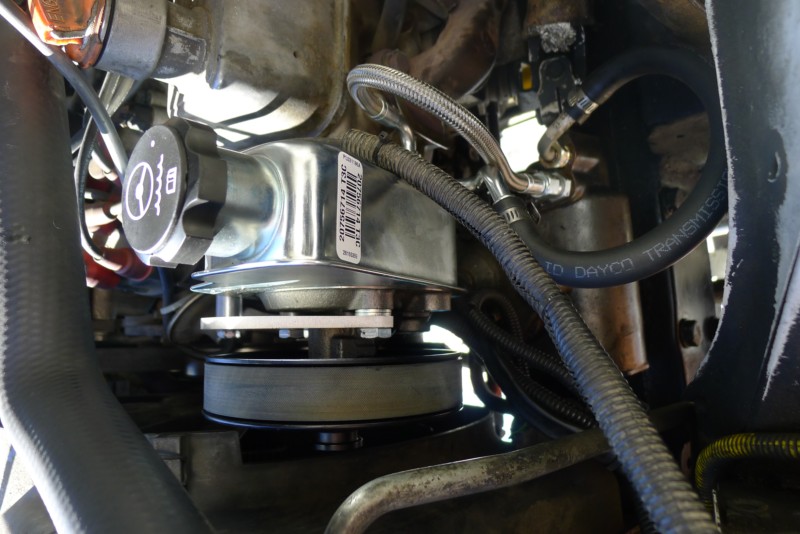
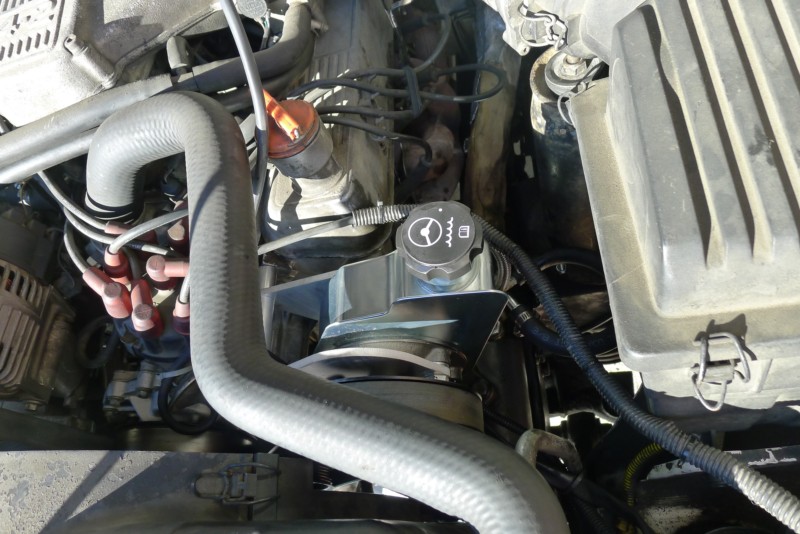
Installation of the pump itself, and two short hoses, was so simple and straightforward that it needed no explanations.
Tools needed for installation (omitting the shock relocation process):
- 1/4" Allen driver for the screw holding the rear pump bracket to the head;
- 9/16" or 14mm, and 17-mm open-end and box wrenches to install the GM pump brackets, and attach the pump to the brackets;
- 13-mm or half-inch wrench that, along with 13-mm or half-inch socket, to reinstall the radiator support bracket;
- flare wrenches for power steering lines at the steering box end (forgot the sizes);
- 15-mm socket or 15-mm box wrench to reinstall the serpentine belt;
- 1/4" hex driver for the MAF sensor hose.
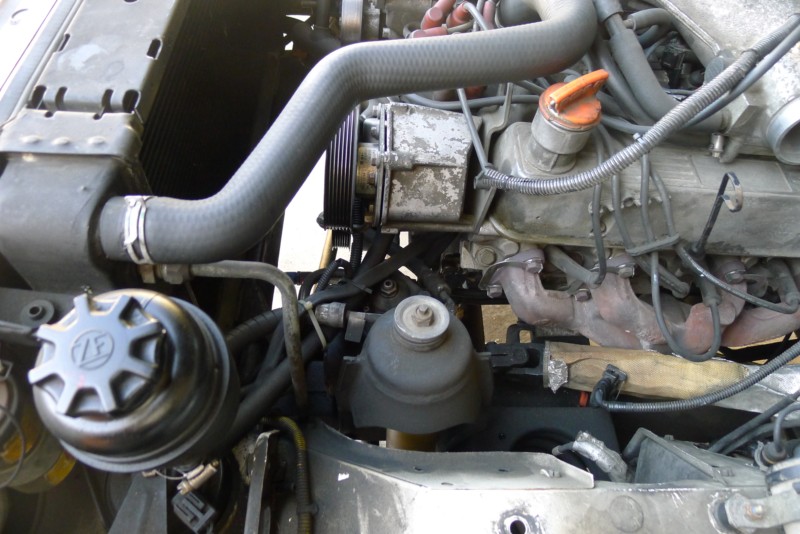
Done. Nick Markiw went out of his way to use at least some Land Rover parts - the serpentine belt is a stock part for Discovery Series 2.
The total price of the conversion kit was about a Ben Franklin more than that for a genuine ZF pump and three hoses from Atlantic British.
The lack of frustration with inability to keep the pump from cavitating and fluid from seeping and leaking, and not having to replace fluid-damaged Panhard rod bushings every three years - priceless.