Another Chevy 250 Conversion

bboretsky

Well-known member
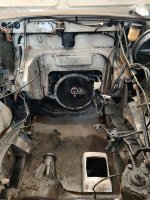
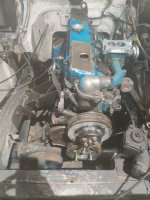
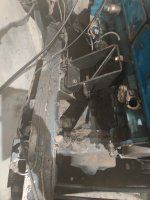
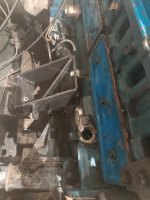
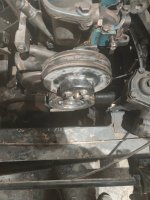
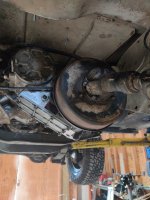
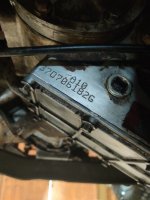
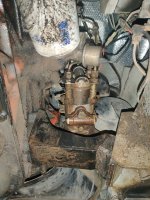
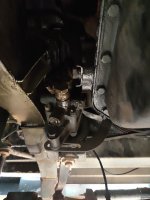
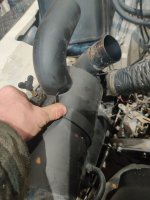
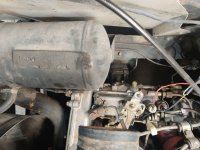
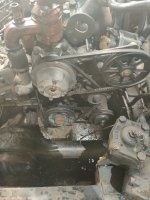
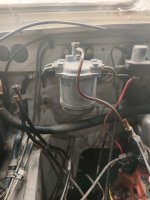
So I have attached a couple pics of the LT230 that is now in and functions excellent. The next pics are on f the removal process. All wiring is labeled. Only have starter wiring and alternator to label and disconnect. There were two wires that went to the fuel pump. One I assume is the fuel shutoff solenoid. I verified the have 12 volts constant, even during start. This will drive the secondary fuse panel via a relay. More tomorrow after I disconnect the power steering lines and pull the engine.
 

Attachments

  • IMG_20210219_154347.jpg
    IMG_20210219_154347.jpg
    173.2 KB · Views: 210
  • IMG_20210219_154355.jpg
    IMG_20210219_154355.jpg
    136.7 KB · Views: 200
  • IMG_20210219_154420.jpg
    IMG_20210219_154420.jpg
    252.8 KB · Views: 206
  • IMG_20210219_154430.jpg
    IMG_20210219_154430.jpg
    126 KB · Views: 205
  • IMG_20210219_155855.jpg
    IMG_20210219_155855.jpg
    129.1 KB · Views: 203
  • IMG_20210219_161058.jpg
    IMG_20210219_161058.jpg
    190 KB · Views: 207
  • IMG_20210219_165217.jpg
    IMG_20210219_165217.jpg
    190.9 KB · Views: 207
  • IMG_20210219_170640.jpg
    IMG_20210219_170640.jpg
    126.5 KB · Views: 207

terryjm1

Well-known member
I have a Santana and am interested in seeing the project come together. I like my diesels but think this could be a good option.
 

bboretsky

Well-known member
Sunday update. Royally screwed up. Purchased a new clutch kit, but it will not fit. The LT85 is not the same spline count. The Defenders are 23 spline and the Series 3 are 10. Reordered the correct clutch. Test fit of the engine looks like everything will mount correctly. Engine mounts line up. Just have to wiggle it into place. Tomorrow is the test of might, getting the engine and transmission mated with the old clutch in place as a temp.
 

terryjm1

Well-known member
Sunday update. Royally screwed up. Purchased a new clutch kit, but it will not fit. The LT85 is not the same spline count. The Defenders are 23 spline and the Series 3 are 10. Reordered the correct clutch. Test fit of the engine looks like everything will mount correctly. Engine mounts line up. Just have to wiggle it into place. Tomorrow is the test of might, getting the engine and transmission mated with the old clutch in place as a temp.
Which clutch set did you get, part number?
 

bboretsky

Well-known member
Pressure plate diameter and type as well as the throwout bearing are correct. This is good because I had the GM flywheel drilled and tapped for that clutch. The old one looks good, with the same bite material as the new one, but has about 1/32 wear.
 

bboretsky

Well-known member
Engine is in! All the bell housing bolts are snugged up with washers and lock washers. I was able to move the starter wire from the battery and route it to the new starter. I had to unwrap a portion of the wiring loom to get enough extra wire for the ignition switch wires that connects to the starter as well. The engine mounts work ok. The driver side was spot on. The pax side had to be extended. I added 3 washers on the bottom two bolts and 5 on the upper. I still had to redrill the hole on the frame mount. Moved it up about 1 inch. Tomorrow will be an electric adventure. All wiring for the EFI and Hyperspark disti will get done. There is plenty of room in front of the engine to install an electric fan that will be controlled be the Holley EFI computer.
 

Attachments

  • IMG_20210222_162229.jpg
    IMG_20210222_162229.jpg
    173.9 KB · Views: 236
  • IMG_20210222_162237.jpg
    IMG_20210222_162237.jpg
    150.6 KB · Views: 235
  • IMG_20210222_162242.jpg
    IMG_20210222_162242.jpg
    172.5 KB · Views: 234
  • IMG_20210222_162421.jpg
    IMG_20210222_162421.jpg
    185.9 KB · Views: 233

Robert

Well-known member
Pressure plate diameter and type as well as the throwout bearing are correct. This is good because I had the GM flywheel drilled and tapped for that clutch. The old one looks good, with the same bite material as the new one, but has about 1/32 wear.

The factory 250 clutch was 10 spline. Was that a no go?
 

bboretsky

Well-known member
I used a land rover clutch. 10 inch instead of the GM 10.5...did not know the GM would work withe the LT85...oh well
 

bboretsky

Well-known member
No photos today. Just a simple update. Unwrapped the front end wiring and moved the alternator wiring to the pax side. No cutting needed. Parking brake wire separated from rest of loom and run back to original switch. Originally run with the starter wire set. starter wires separated and moved. No cutting needed. Starter also on pax side vs drivers for the 12j. Re-stabbed the Disti and mounted the Holley Sniper. Had to clearance an edge on the custom spacer for the throttle linkage.

Tested the ignition and turned over without issue. I still have to figure out which fuse is the fuse for the glow plugs so I can leave it in place but have it disabled. Always thinking about if the next owner and whether they have any to go back to original. So far the ONLY wire I cut was the end of the alternator plug that feeds the gauge.
 

terryjm1

Well-known member
Engine is in! All the bell housing bolts are snugged up with washers and lock washers. I was able to move the starter wire from the battery and route it to the new starter. I had to unwrap a portion of the wiring loom to get enough extra wire for the ignition switch wires that connects to the starter as well. The engine mounts work ok. The driver side was spot on. The pax side had to be extended. I added 3 washers on the bottom two bolts and 5 on the upper. I still had to redrill the hole on the frame mount. Moved it up about 1 inch. Tomorrow will be an electric adventure. All wiring for the EFI and Hyperspark disti will get done. There is plenty of room in front of the engine to install an electric fan that will be controlled be the Holley EFI computer.
On the pass side rubber mount, do you know the part number? I’m curious if a different one would fit better.
 

bboretsky

Well-known member
It was original to the 12J, bit being a Santana, it looks different to the Rover branded ones. I am trying to get dimensions of the Rover ones to see.
 

Napalm00

Technical Excellence Contributor
Ahhh santana that explains it. If you need dimensions lmk I have some laying around
 
Top