1994 RRC LWB 300Tdi

RiftRover

Well-known member
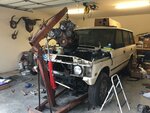
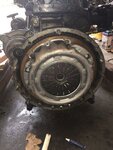
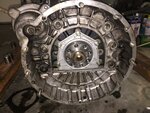
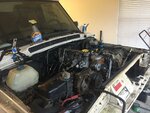
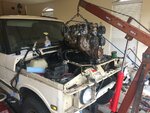
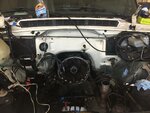
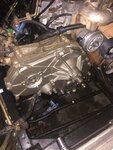
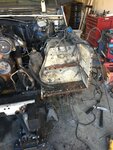
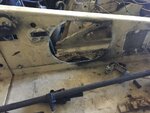
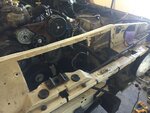
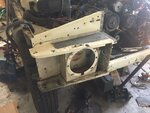
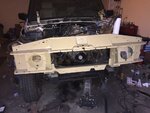
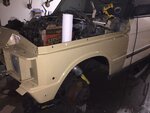
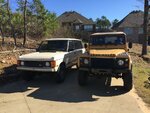
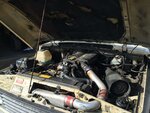
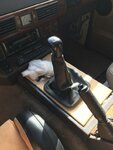
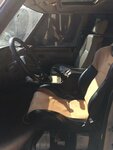
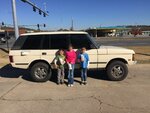
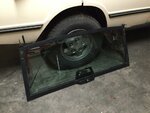
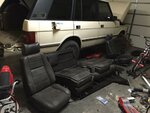
I didn't get very far with my build thread on the other site so i figured I might as well post it here. I bough this truck on Ebay in November of 2015 for pretty short money. I knew the conversion wasn't perfect and it would need some attention. I drove it for about two months until the clutch failed. With busy life it sat in the garage until June 2016 when I was going to get the engine out. Got about half way until life took over again. Sold the 110 in the fall which remotivated me to work on this truck. Got a lot done over the holidays so decided it was time to catch up on posting. Here is what it looked like when I got it.
 

Attachments

  • IMG_1172.jpg
    IMG_1172.jpg
    154.8 KB · Views: 261
  • IMG_1405.jpg
    IMG_1405.jpg
    133.2 KB · Views: 238
  • IMG_1404.jpg
    IMG_1404.jpg
    80.2 KB · Views: 244
  • IMG_1403.jpg
    IMG_1403.jpg
    131.9 KB · Views: 235
  • IMG_1401.jpg
    IMG_1401.jpg
    54.3 KB · Views: 240
  • IMG_1400.jpg
    IMG_1400.jpg
    42.8 KB · Views: 250
  • IMG_1170.jpg
    IMG_1170.jpg
    119.8 KB · Views: 253

RiftRover

Well-known member
One of the first things I did was to replace the drive belt and idler. It was making a squeaking noise that was obnoxious... I also discovered that the oil cooler lines were leaking which was making an absolute mess of everything, so I replaced those too.
 

Attachments

  • IMG_1424.jpg
    IMG_1424.jpg
    131 KB · Views: 233
  • IMG_1542.jpg
    IMG_1542.jpg
    67.3 KB · Views: 213
  • IMG_1543.jpg
    IMG_1543.jpg
    111.1 KB · Views: 228

RiftRover

Well-known member
Some time last year I picked up a complete Sable interior from a local friend. I really love the color but still not sure if I'm going to use it or not. I really want a shoulder seat belt in the middle of the rear seat since I have three kids, so I'm considering fitting a D2 rear seat. Also picked up some other goodies from him at the same time.
 

Attachments

  • IMG_1426.jpg
    IMG_1426.jpg
    86.4 KB · Views: 223
  • IMG_1425.jpg
    IMG_1425.jpg
    103.9 KB · Views: 230
  • IMG_1427.jpg
    IMG_1427.jpg
    96.3 KB · Views: 229

RiftRover

Well-known member
Finally got around to pulling the engine over the holidays. It's a total pita with a 300 TDI in a classic because the engine is very close to the firewall and tucked under the cowl. Had to raise the front of the engine, remove the mounting brackets, drop it down to access the nuts on the flywheel/bellhousing, etc., etc... :mad: 
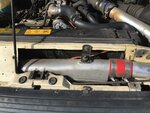
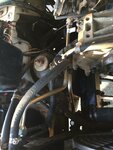
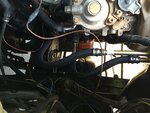
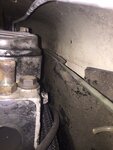
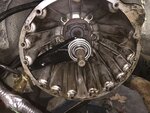
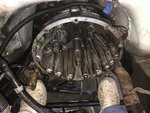
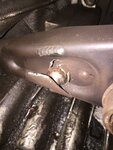
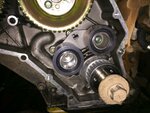
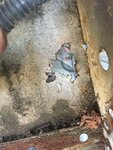
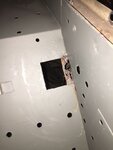
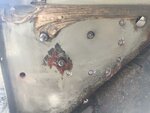
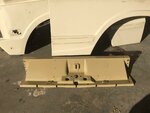
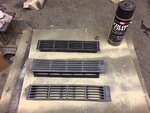
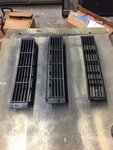
Typical rover issue I guess. Once I figured out what to do it wasn't that bad.
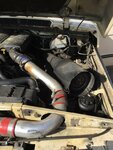
 

Attachments

  • IMG_3059.JPG
    IMG_3059.JPG
    64.9 KB · Views: 222
  • IMG_3060.JPG
    IMG_3060.JPG
    81.2 KB · Views: 220
  • IMG_3061.JPG
    IMG_3061.JPG
    67.8 KB · Views: 226
  • IMG_3248.jpg
    IMG_3248.jpg
    127.4 KB · Views: 217

RiftRover

Well-known member
I?ve posted about the clutch in other threads but this is what I found when I finally got the engine out. The ?heavy duty? fork had failed catastrophically. The heavy duty forks are actually cheaper quality than the genuine part, with the added metal so they can charge more for it. I ended up going back with a genuine fork that I welded my own backing plate too. We?ll see how it holds up. The original pivot was extremely worn as well which didn?t help, so I replaced that too. Since the engine was out I replaced the rear main seal and of course the clutch itself. Went with a heavy duty. It's a lot easier to work when you can sit in the engine bay!
 

Attachments

  • IMG_3357.jpg
    IMG_3357.jpg
    154.1 KB · Views: 216
  • IMG_3355.jpg
    IMG_3355.jpg
    150.1 KB · Views: 219
  • IMG_3334.jpg
    IMG_3334.jpg
    77.9 KB · Views: 220
  • IMG_3310.jpg
    IMG_3310.jpg
    130.6 KB · Views: 237
  • IMG_3354.jpg
    IMG_3354.jpg
    73.4 KB · Views: 225
  • IMG_3250.jpg
    IMG_3250.jpg
    67.3 KB · Views: 227

RiftRover

Well-known member
Not sure if there is any interest in this build or not but I'll keep posting either way... :rolleyes:

Once the clutch was finished I cleaned up the firewall and coated it, then it was time to reinstall the engine. A few more pics of how tight it is with the 300. Had to go through the same procedure as removal to reinstall, but much easier when you've already done it once.. :) The bungee cord helps when you are doing it solo!
 

Attachments

  • IMG_3403.jpg
    IMG_3403.jpg
    123.2 KB · Views: 222
  • IMG_3401.jpg
    IMG_3401.jpg
    115.7 KB · Views: 229
  • IMG_3399.jpg
    IMG_3399.jpg
    132.9 KB · Views: 224
  • IMG_3360.jpg
    IMG_3360.jpg
    122 KB · Views: 231

RiftRover

Well-known member
Once the engine was back in it was time to do the timing belt along with new tensioner, idler and crankshaft sprocket. I tried everything known to man to clean up the timing cover but nothing would make it look nice. Ended up painting it with engine paint, so we'll see how long it lasts.
 

Attachments

  • IMG_3424.jpg
    IMG_3424.jpg
    120.8 KB · Views: 224
  • IMG_3426.jpg
    IMG_3426.jpg
    133.9 KB · Views: 221
  • IMG_3464.jpg
    IMG_3464.jpg
    81.3 KB · Views: 231

rovercolorado

Well-known member
Keep the posts up it's nice seeing things with pictures.
I was wondering why you didn't do the timing belt when it was out of the truck?
 

javelinadave

Administrator
Staff member
Way easier to do the belt when the motor isn't on the floor. I'm doing the same on a buddy's truck this Saturday.
 

RiftRover

Well-known member
Keep the posts up it's nice seeing things with pictures.
I was wondering why you didn't do the timing belt when it was out of the truck?

Way easier to do the belt when the motor isn't on the floor. I'm doing the same on a buddy's truck this Saturday.

Yep. It's a lot easier when it's mounted. Plus I needed to get the engine back in when I had the time over the holidays, whereas the timing belt was easy enough to do in the evenings.
 

RiftRover

Well-known member
Damn that is a tight fit! Too bad the rad support does not bolt on & off.

It's a total pita! I will actually be replacing the top of the rad support to fix the giant hole that the previous owner cut for the ridiculous intercooler that was mounted, but honestly the bigger issue with mounting the engine was the clearance at the firewall. Certainly hope I don't have to remove it again any time soon.
 

RiftRover

Well-known member
Body work

With the engine mounted I've turned my attention to the body work. As I said before the previous owner hacked up the front end to mount a junk yard intercooler instead of just sourcing the correct rad and intercooler setup. NOT COOL! This is a pain in the butt to fix but I can't leave it alone. Of course I found some rust issues that now also have to be fixed... :eek: Had to drill out MANY spot welds to get the affected parts off the front.
 

Attachments

  • IMG_3535.jpg
    IMG_3535.jpg
    225.3 KB · Views: 218
  • IMG_3537.jpg
    IMG_3537.jpg
    169.5 KB · Views: 213
  • IMG_3542.jpg
    IMG_3542.jpg
    73.4 KB · Views: 242
  • IMG_3545.jpg
    IMG_3545.jpg
    80.1 KB · Views: 227
  • IMG_3534.jpg
    IMG_3534.jpg
    183.2 KB · Views: 232
  • IMG_3533.jpg
    IMG_3533.jpg
    168 KB · Views: 221
  • IMG_3503.jpg
    IMG_3503.jpg
    111.2 KB · Views: 214
  • IMG_3532.jpg
    IMG_3532.jpg
    105 KB · Views: 213
  • IMG_3529.jpg
    IMG_3529.jpg
    129.6 KB · Views: 216
  • IMG_3527.jpg
    IMG_3527.jpg
    113.6 KB · Views: 224

RiftRover

Well-known member
Also went ahead and painted some of the replacement parts in the new color. I'll have to touch up after welding but I was excited to see the new paint on something plus it's easier to paint the nooks and crannies with the parts off the truck.
 

Attachments

  • IMG_3495.jpg
    IMG_3495.jpg
    104.9 KB · Views: 207
  • IMG_3502.jpg
    IMG_3502.jpg
    77.7 KB · Views: 204

RiftRover

Well-known member
I also found time to refresh the vents in the cowl. SEM makes some great products for this kind of stuff.
 

Attachments

  • IMG_3512.JPG
    IMG_3512.JPG
    710.2 KB · Views: 203
  • IMG_3513.JPG
    IMG_3513.JPG
    695.8 KB · Views: 187
  • IMG_3514.jpg
    IMG_3514.jpg
    252.9 KB · Views: 200

RiftRover

Well-known member
Pushed hard over the weekend to get the bodywork back together and painted. Welding the thin metal was a pain but I got a lot of practice, that's for sure. Should be able to get it driving again soon. Pictures aren't great cuz it's always dark when I get home.
 

Attachments

  • IMG_3553.jpg
    IMG_3553.jpg
    110.5 KB · Views: 194
  • IMG_3565.jpg
    IMG_3565.jpg
    106.8 KB · Views: 191
  • IMG_3570.jpg
    IMG_3570.jpg
    84.3 KB · Views: 186
Top